About Me

My photo
My name is Randi and I am a college Senior. I'm studying in the engineering field and will be graduating in December in 2014! I created a blog to write about my addiction to nail polish ( and all that it involves) and also to document and share my journey to becoming healthy!
Showing posts with label nails. Show all posts

Sunday, June 15, 2014

As times change so do we....

Hello Lovelies! 

I'd like to take a moment and reflect where this blog was and where it's heading! Over the past month I have really changed my lifestyle around. I started working out 5 times a week, cut out fast food and almost all soda. I say almost because I NEED my Ginger Ale when I'm sick! It's my only vice! :) 

Anyways, this blog has been strictly nails and polish swatches BUT that is all going to change. I'm still going to continue to do nail post but I'm also going to incorporate things like my workouts, my favorite recipes and things I've accomplished! :)

 So my blog name will be changing! Drum roll please......... My new blog name will be..... Fit&Polished! I think this really encompasses where my life is heading and I am super excited about it! I'm really looking forward to this change and I hope you all will continue to support me! 


As always, much love,
Randi


Saturday, February 15, 2014

Zoya Haul Part VI

Hello Lovelies!

This is the piece of resistance!! *insert fancy accent here* Last but not lease my favorite color that I picked up through their promotion! Again, I hope it doesn't surprise you all that it is purple! Here is Aurora!

Yes I realize this picture isn't focused or anything but I really was trying to capture the full holographic effect of this polish and all that it had to offer! When I wear this polish I often have to stop myself from just completely starring at them the whole time!


I really love that most about this polish is that its a unique shade of purple to begin with. In different light it completely changes its color, tones and the holo picks up different colors. But hands down, this color is MIND BLOWING! It's purple, holographic, and completely stunning.


Here is just a few more photos of Aurora! If you don't think this is the most beautiful polish you've ever seen then- well then I'm not sure, I just think you need to rethink that! These pictures honestly catch the most beautiful effect of this polish at any angle!


 Please enjoy and I hope you all loved this series!

Much Love,
Gingerella

Sunday, February 2, 2014

Zoya Haul Part IV

Hello Lovlies!

Sorry I have been a little MIA for a few day! I had a huge lab report doing and it was literally EATING any free time I had! Good news- IT'S DONE AND TURNED IN! *crowd cheers!* In some other random good news, I have found a company to fund my (and my senior design partner) senior project! Fingers crossed, good vibes, and hopefully it leads to a job offer! :)

But, back to what we reeeallly came for... the polish! <3 I am very glad I took these picture before I sat down to actually write this because as of last night (Saturday 2/1) I now am sportin some shorties! I had a pretty bad break a few weeks ago and then recently I have been plagued by some corner breaks. SO, I am starting over!

I only have 3 more polishes to conclude my pretties from Zoya's 3/$12 promo! To get on with it, I am going to start with the beautiful Payton! (How fitting since today Payton Manning is playing in the Super Bowl today)


I was told by a lot of my fellow Polish Addicts that Payton is their favorite! It's purple so of course I would love it and it is a Zoya's holographic line! Being that I am very new to holographic nail polish but have seen many absolutely stunning shades, I had high hopes!


I love that Payton is purple, but honest opinion, the holographic wasn't like "OMG I NEED." For instance in this picture, you can't really tell that it is a holographic polish. The only way you can see it, is if you actually have my hand in you hand and looking at my nails.


This picture you can kiiinda see the holo, but again it really isn't an in-your-face type of holo, so I was a little disappointed in that sense. However, I was really impressed with how smoothly I was able to apply this. It went on super easy, and I probably could have gotten away with one coat, but I did have a few minor spotting towards the cuticle.


Now this is probably thee best picture of Payton! You can see her absolutely breathtaking purple shade! It's almost a dark wine color- that I am in love with, and you can start to catch the holographic glitters in the polish!


In a close up of Payton you can finally see her absolutely gorgeous holo! Being said again, I think because Payton is such a dark purple that is why her holo is a bit masked! 


Much Love,
Gingerella


Tuesday, January 28, 2014

Zoya Haul PART III

Hello Lovelies,

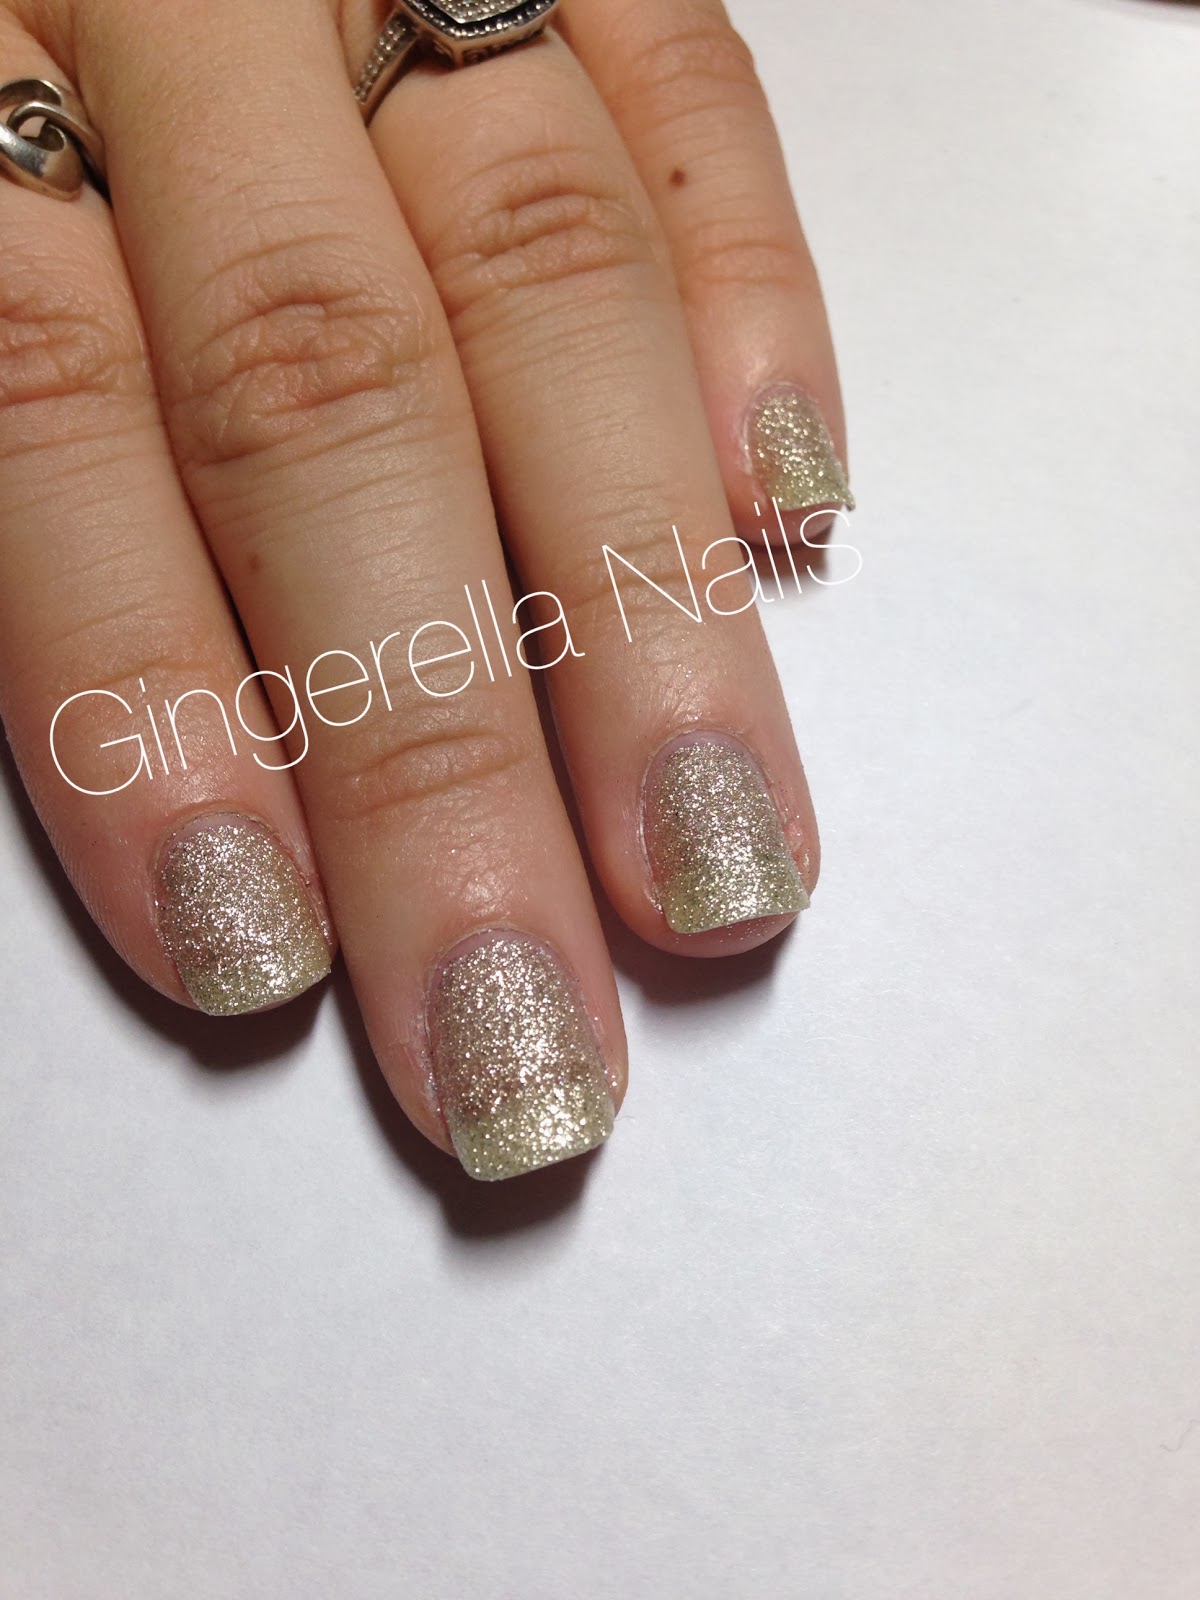
Here we are again for my third part of this lovely series I've started :) I am really enjoying this amazing process of trying new colors completely out of my comfort zone! This is my 3rd and final PixieDust polish I picked up from their 3/$12 and even though Stevie holds my actual heart-Tomoko is to DIE for! It is thee most sparkle I have ever seen on my nails. I just could not stop starring at it!


As you can see, it isn't very opaque, this is 3 coats of this beauty. OH WELL! I can totally get over that, seriously! Just LOOK at it sparkle! I figured next time I use Tomoko, I'll probably use a creme or pink polish underneath just to offset having to add a million layers to get the coverage I want!


To me 100% honest, I am having a hard time describing Tomoko's color! When the light hits it one way you pick up a lot of gold tones, and then move your head a different way and it's like completely silver. Just look at the picture above!! It totally just looks like a bunch of silver glitters glistening in the light! :)


This picture, I think it is a bit odd that it seems like it is picking up some green tones..... and then I remembered while I was trying to take pictures- I was wearing a green shirt. So the color it throws off may even pick up on the color it's surrounded by. Which is pretty cool, I think! :)


In the same sense that in this picture, you can really see how sheer it is, yet completely flawless at the same time! It honestly BLOWS MY MIND!!


This is an up-close-and-personal type shot. Some may actually not like this because of fear of being able to see the dirt. You know, that no matter what you do to keep them clean, always manages to end up under your nails. So it may be a hit or miss, but my thought is.... no one is going to be looking at my nails that closely anyway so I'll ROCK my pretty Tomoko painted nails!!

Now, the only problem is to try not to get distracted from my work/school work from starring at my nails to much!! :x


Much Love,
Gingerella

Saturday, January 25, 2014

Zoya Haul PART II

Hello Lovelies!

I'm glad to have you visiting my page again, and if this is your first time I'd like to revert you back to my previous post where I stated that I will be doing almost a series-type deal with my polishes I picked up fro Zoya's most recent promo (3/$12)! Also, for a reminder, these are my first (few) Zoyas!

Since I started out with my beloved Stevie, which as we know is a PixieDust, I thought it would be fun to do the rest of the Pixies that I picked up, and then move on to the others. So, this post I will be talking about London!


At first glance, I was a tiiiiny bit disappointed. I don't own a lot of grey polished, actually just one from a sub box I have, and I haven't had the chance to use it. Don't get me wrong, the polish look absolutely beautiful in the bottle-I always have a fear it'll look good in the bottle and NOT on my nails. That is what made me feel a bit indifferent about it!


After a good layer of base coat, and one coat of London, I was feeling more hopeful that this color was going to look fabulous on me! I am a natural red head and all my life I have had to watch which colors I wore. For instance, I have not ever been able to wear red. I completely, 100% washes me out! So, for the sake of apologies- I'm soooo sorry I ever doubted you London!


For me, this polish did go on a bit sheer. Sheerer ( if that is even a word?) than I thought, so I did end up using 3 coats. What I did notice, and I LOVE, about these wonderful PixieDust is that you can absolutely tell whenever they are dry! I'm not even sure how to explain it, but you can see it drying into the textured goodness it promises!


The shine and sparkle this lovely grey matte polish gives off is absolutely mind blowing! I can't really wrap my head around the fact that this is a grey matte polish sparkles so much! :)


And yet in this picture (above) you see a completely different side of this polish. It is dark, and sparkly and you can really see all the detailed textures in the dried polish!


Much Love,
Gingerella 


Saturday, January 18, 2014

Early Valentine's Day mani for Mom

Hello lovelies! I am waiting on some nail mail to write about, but since Valentine's Day is (kinda) right around the corner, I thought I would give my mom a Valentine's Day theme! :)

To start off, I am not using regular polish! My mom works in the medical field so wearing regular polish would chip after a day of washing her hands about a billion times! For Christmas my parents got me an at-home gel polish kit and boy has it changed mine, and her, nail polish life! :) 
This is the kit that I got. I originally found it at Target at a price of $79.99, and honestly that was just tooo much for me to let my parents buy it. So, I turned to Amazon and found it (eventually) for $43.79 and free two day shipping!!! Now that is a price that I was excited about, almost half off the in-store price tag! I have quickly became very addicted to gel polish and all things gel polish! Haha 

Without further ado, here in the complete Valentine's Day themed mani that my Mom is sportin'! 


The gel polishes I used to do this mani include:


2 coats of Finger Paints Gel Polish in Impressionst Pink cured for 45 seconds each coat


Sensationail Color Gel Polish in Sugar Plum for the French tip cured for 20-35 seconds (depends if I remembered to count while working on the other hand!), and


Finger Paints Gel Polish in True To The Art to create the small heart on both ring fingers cured for 20 seconds.

After both hands were completely cured, I like to let them "air out" anywhere from 30-60 seconds and then apply the gel top coat! I applied a thin layer of top coat and made sure that absolutely no top coat was touching any portion of the nail wall or cuticle! Making sure that it isn't touching anywhere and cure for the 45 seconds. See if the top coat is touching the skin at any location, during the curing process, it burns a bit. Not so much that "you're" left with burn marks, it just gets pretty hot and after the nail grows out a bit it will increase the likeliness of the gel polish lifting, and pulling away from the nail. Picking gel polish off is VERRYYY bad!!!!! It will peel layers of your nails off so PLEEASEEE remove by scratching the shiny layer off (with a finger nail file or buffing block), soaking your nails in 100% Pure Acetone, or by using felt squares/cotton balls and aluminum foil for 10-15 minutes. They practically slide right off! After curing the top layer for the 45 seconds, again allow some time for them to get some air, then to get the sticky layer off, you simply take a felt square/cotton ball, dip it in some rubbing alcohol, and rub over all the nails! Last, but not least, apply cuticle oil all around the nail and try and remember to continue to apply cuticle oil throughout the life of the mani! 

Much Love,
Gingerella